
Blog
How to Give Hastings Webworks Access and Connect Your Domain (Step-by-Step Guide)
Follow this step-by-step guide to invite Hastings Webworks as a Cloudflare admin and link your domain inside your client portal.

Client guide
How to give Hastings Webworks access and link your domain
This guide shows exactly how to invite Hastings Webworks as a Cloudflare super admin and then verify your domain in the client portal.
Before you start
- You have a Cloudflare account and your email is verified.
- You already purchased your chosen domain.
- You can log in to your Hastings Webworks client portal.
Important
Your Cloudflare account email must be verified before you can send invites.
Part 1 - Invite Hastings Webworks as an admin
We need admin access so we can connect DNS, SSL, and routing for your website. The blue boxes in the screenshots show exactly where to click.
Step 1: Open Manage Account -> Members
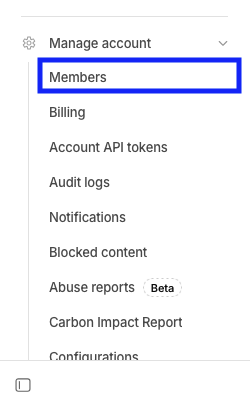
From the Cloudflare dashboard, open the Manage Account dropdown and select Members to reach the members screen.
Manage Account dropdown -> Members.
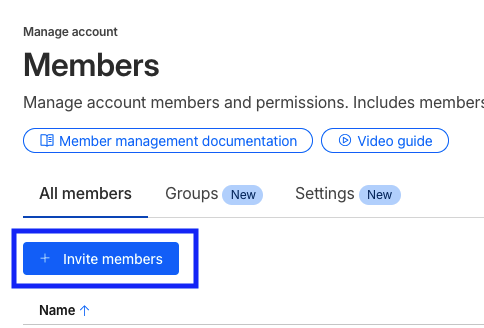
Step 2: Click Invite Members
On the Members page, select the Invite Members button under All Members.
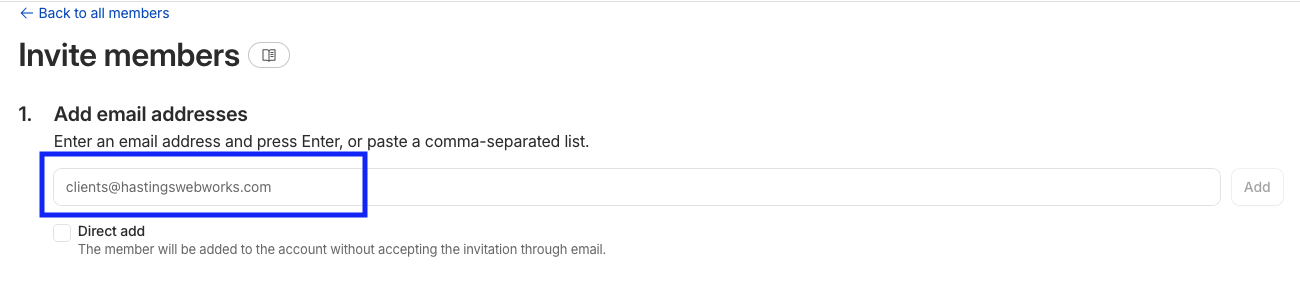
Step 3: Add the Hastings Webworks email
In the Add Email Address section, enter [email protected].
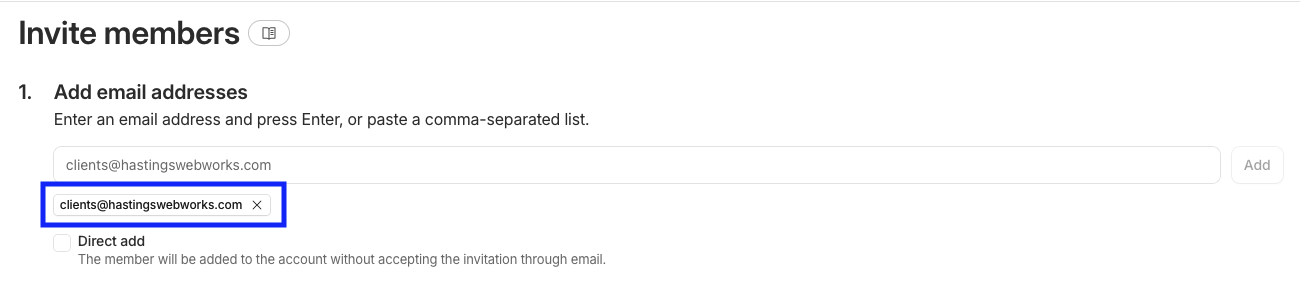
Step 4: Confirm the email appears below the box
Press Enter if needed and make sure the email appears as a chip under the input. Do not use the direct add button.
Step 5: Create a policy
Under section 2, click Create a policy to define the correct access level.

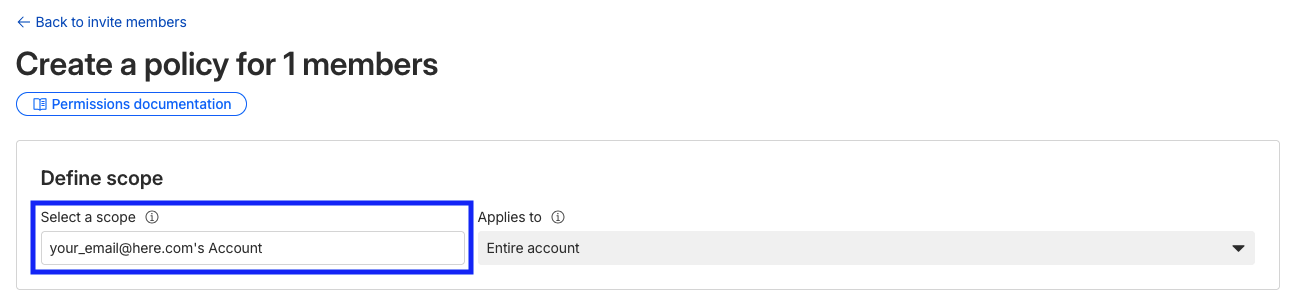
Step 6: Select your account scope
Choose your account from the Account-level dropdown (it will show your email and 's Account). Make sure Applies to is set to Entire Account.
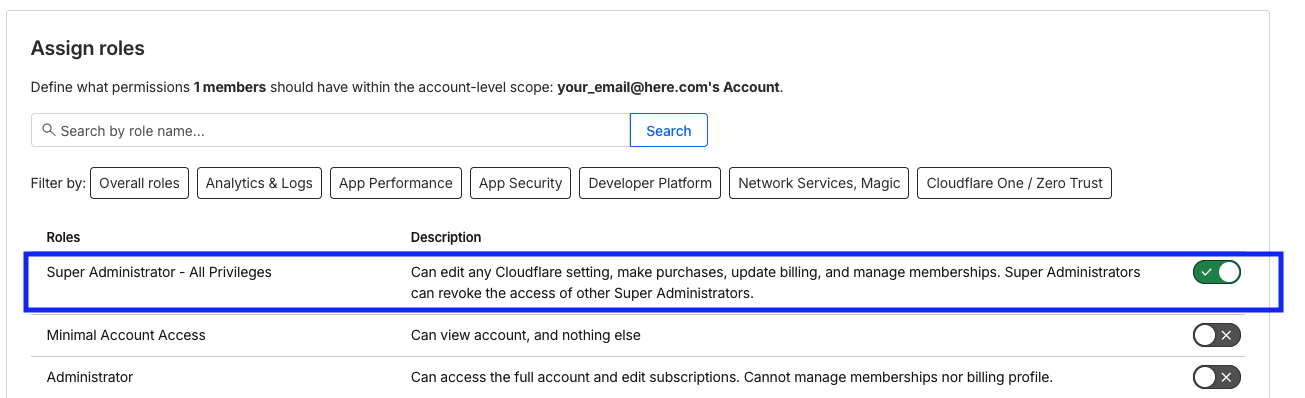
Step 7: Enable Super Administrator - All Privileges
Toggle the Super Administrator - All Privileges role so it turns green.
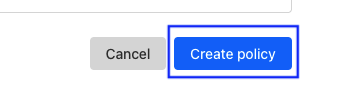
Step 8: Create the policy
Click Create Policy to return to the Invite Members page with the settings filled in.
Step 9: Review the invite summary
Check that the email, scope, and Super Administrator role look correct before sending.
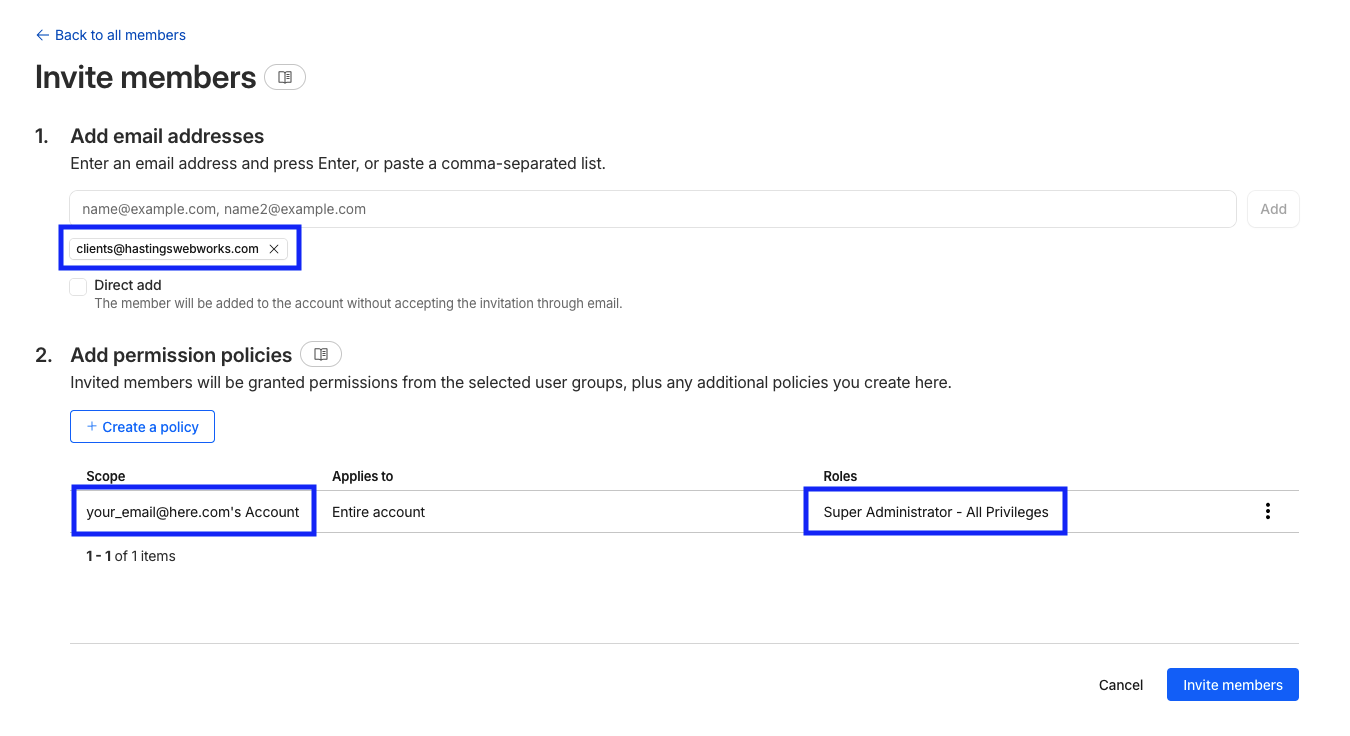
Step 10: Send the invite
Click Invite members in the bottom-right to send the invite to Hastings Webworks.

All done
The invite will automatically be accepted when you complete part 2 below.
Part 2 - Link your domain in the client portal
After sending the invite, confirm the domain inside your Hastings Webworks client portal so it can be verified and connected.
Step 1: Open the client portal and scroll to Linked domains
Use the Client Portal button in the header, log in, and scroll to the Linked domains section.

Step 2: Click Link a domain
This opens the domain verification popup.

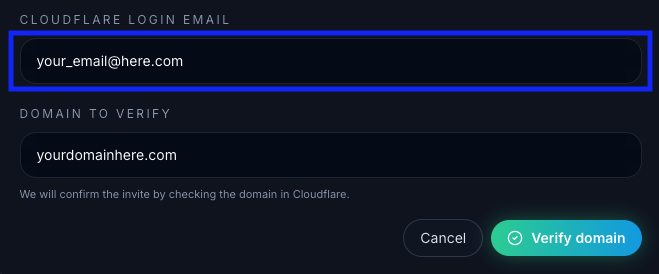
Step 3: Enter your Cloudflare login email
Enter the same Cloudflare login email you used to send the invite.
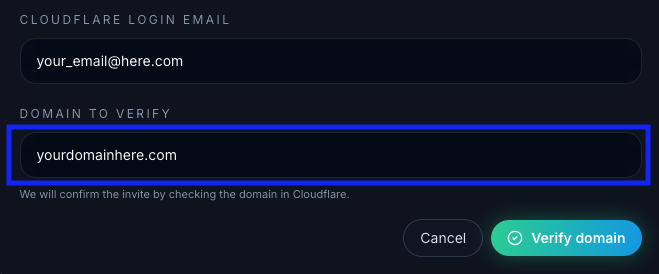
Step 4: Enter the domain to verify
Type the domain you want to connect (for example: yourdomain.com).
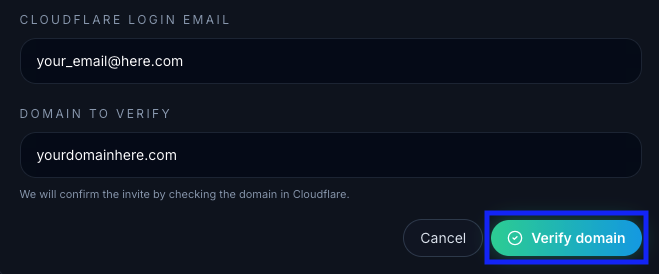
Step 5: Click Verify domain
If the invite and domain are correct, the domain will appear under Linked domains and show as active.
Troubleshooting
If something fails, use the quick fixes below.
Quick fixes
We could not connect to Cloudflare. Please try again later.
A temporary system or API issue. Try again in a few minutes.
Enter email and domain.
One of the fields is empty.
Send the invite from this email to continue.
The invite was sent from a different Cloudflare email.
Send the invite before linking domains.
We have not received the invite yet for this account.
Invite needs Read or Admin access.
The invite role is too low. Enable Super Administrator.
Domain is not in that Cloudflare account.
The domain is owned by a different Cloudflare account.
Domain is not in your linked account.
Another Cloudflare account is already linked in your portal.
Unable to load domains right now.
Temporary API failure. Retry in a few minutes.
Unable to link domain right now.
Temporary API failure. Retry in a few minutes.
Select a domain to unlink.
No domain was selected to unlink.
Unable to unlink domain right now.
Temporary API failure. Retry in a few minutes.
Need a hand?
If you are stuck, send us a message and we will help you through it.